Most people judge a deck by its surface — the boards, the stain, the railing they lean against. But the parts that actually fail are rarely the ones you see. National inspection data is blunt about it: roughly nine out of ten deck collapses begin at a single hidden connection, and the boards on top often look perfectly fine right up to the moment the structure lets go.

That gap between what looks safe and what is safe is the whole reason a real deck inspection checklist matters. This guide walks through fifteen critical points one at a time, grouped the way a professional actually moves through a structure — from the connection at the house all the way up to the surface underfoot. Each point explains not just what to check but why it matters and what a failure means. It draws on the field experience behind ABD Inspections, a Sacramento firm with more than a thousand assessments completed, and it is written for two readers at once: the owner doing a careful first pass, and anyone who wants to understand what a thorough evaluation truly covers.
Why a Deck Needs a Structured Inspection
A deck spends its entire life outdoors, absorbing whatever the seasons deliver. Across a single year the wood takes ultraviolet punishment in summer, soaks through wet winters, expands and contracts with every temperature swing, and carries the steady mechanical load of feet and furniture. None of that wear announces itself. It gathers quietly, out of sight, inside the framing beneath the surface — which is exactly where a casual glance never reaches, and exactly what a professional manual for the inspection of residential wood decks and balconies is built to catch.
That is why a deck structural inspection follows a set order rather than wandering wherever the eye happens to land. Working through the frame methodically, from the ground connection upward, is the only reliable way to reach the members that carry the real risk before they ever carry a crowd. A written sequence turns a vague sense of worry into a series of specific, answerable questions. It is the same discipline behind a manual for the inspection of residential decks: a fixed order that makes sure the one connection most likely to cause a collapse never gets skipped.
There is a second reason the order matters. Defects rarely stay isolated — a failed flashing detail feeds water into a ledger, the wet ledger softens the framing behind it, and the softened framing loosens the connectors that were holding everything together. Reading the deck from its attachment point outward lets an inspector follow that chain in the direction water and load actually travel, rather than discovering the end of the story first.
The Fifteen Points, Grouped by System
This checklist for deck inspections is organized into three groups that mirror how weight moves through a deck: the connection to the house, the load path underneath, and the parts people touch every day. The table gives you the shape of the whole inspection at a glance; the sections that follow break down each point on its own.
|
Group |
Points |
What it governs |
Why it ranks here |
|
The house connection |
1–5 |
Ledger board, flashing, fasteners |
A failure here drops the entire deck — the leading cause of collapse |
|
The load path |
6–10 |
Posts, footings, beams, joists, connectors |
Carries weight to the ground; hidden rot lives here |
|
The touch points |
11–15 |
Railings, stairs, walking surface |
The leading source of injuries, even without a full collapse |
Notice how the ranking follows consequence, not convenience. The surface you actually see sits last, because as dangerous as a splintered board is to a bare foot, it rarely puts lives at risk the way a failed ledger does. With that map in mind, here is each point in detail.
Points 1–5: The Connection to the House
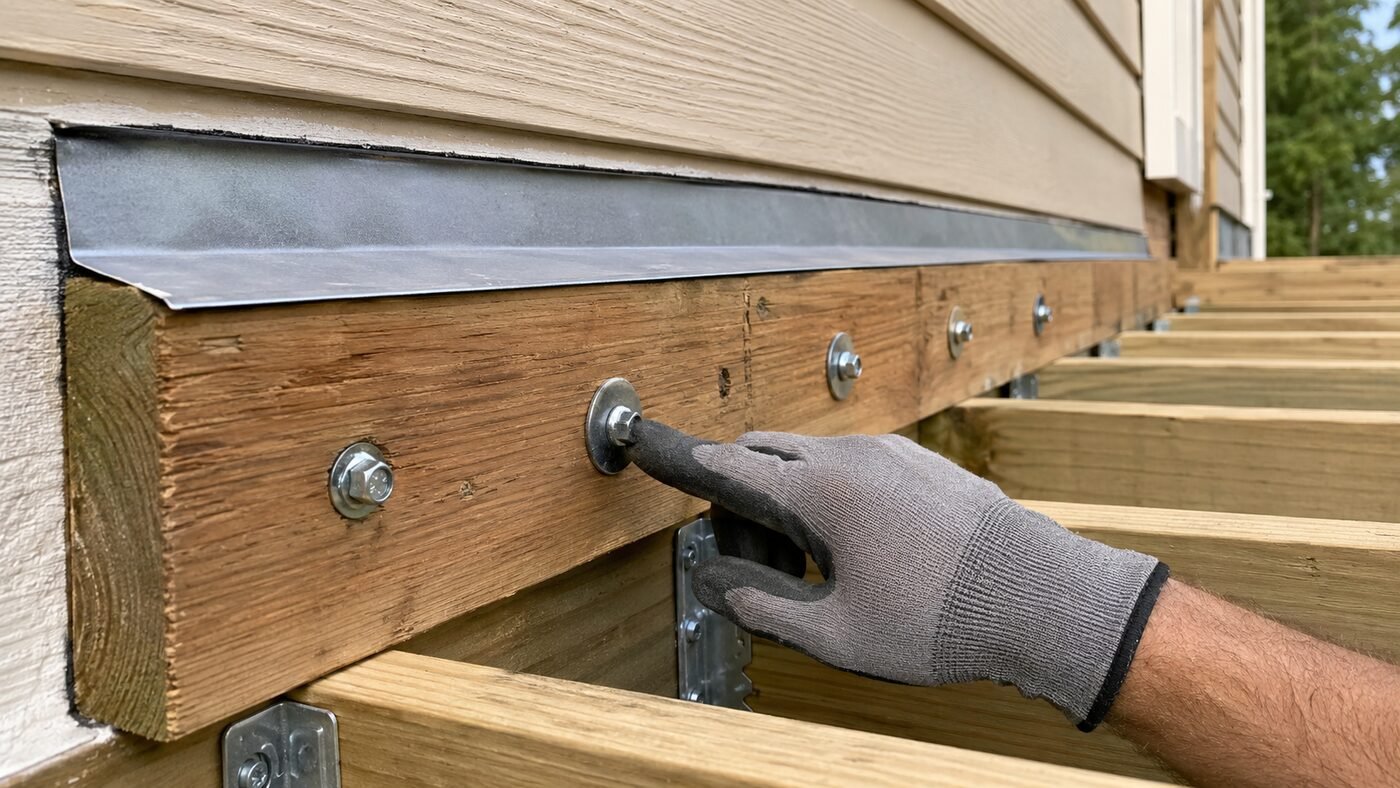
If you check nothing else on the entire list, check where the deck meets the building. Inspection organizations attribute the large majority of deck collapses to the ledger board separating from the structure, which lets the deck swing away and drop. That makes a thorough deck ledger board inspection the highest-value work you can do, so this group comes first.
- No gap at the wall. Stand where the deck framing meets the house and look for any separation, however slight. A visible gap means the connection is already moving, and movement under load only accelerates — the earliest external warning that a ledger is letting go.
- Intact flashing over the ledger. Flashing is the metal or membrane layer that sheds water off the top of the ledger. When it is missing, torn, or poorly lapped, water runs behind it into the wall cavity and the framing, where rot begins out of sight. Confirm it is present, continuous, and actually directing water outward.
- Clean siding below the joint. The wall surface directly beneath the connection tells a quiet story. Rust streaks, dark staining, or blistered paint there indicate water has been tracking through the joint for some time, even if the ledger still looks sound from above.
- Tight, corrosion-free fasteners. The ledger must be held by lag screws or through-bolts, never by nails — the code prohibits nails here because they withdraw straight out under load. Each fastener should be snug, fully seated, and free of the rust that thins a bolt until it snaps.
- Firm wood at the attachment. Probe the wood at the ledger and the band joist behind it. Sound timber resists; soft or spongy wood has already begun to decay, and decay at this joint is the single most dangerous finding on a deck. Equally important is what sits between the ledger and the house — it must bear against solid framing, not brick veneer or siding left in place during a rushed build.
Taken together, these five points confirm the deck is still genuinely tied to the building. If even one fails, everything above it becomes suspect, and the right move is to stop and bring in a professional before the structure holds another gathering.
Points 6–10: The Load Path Underneath
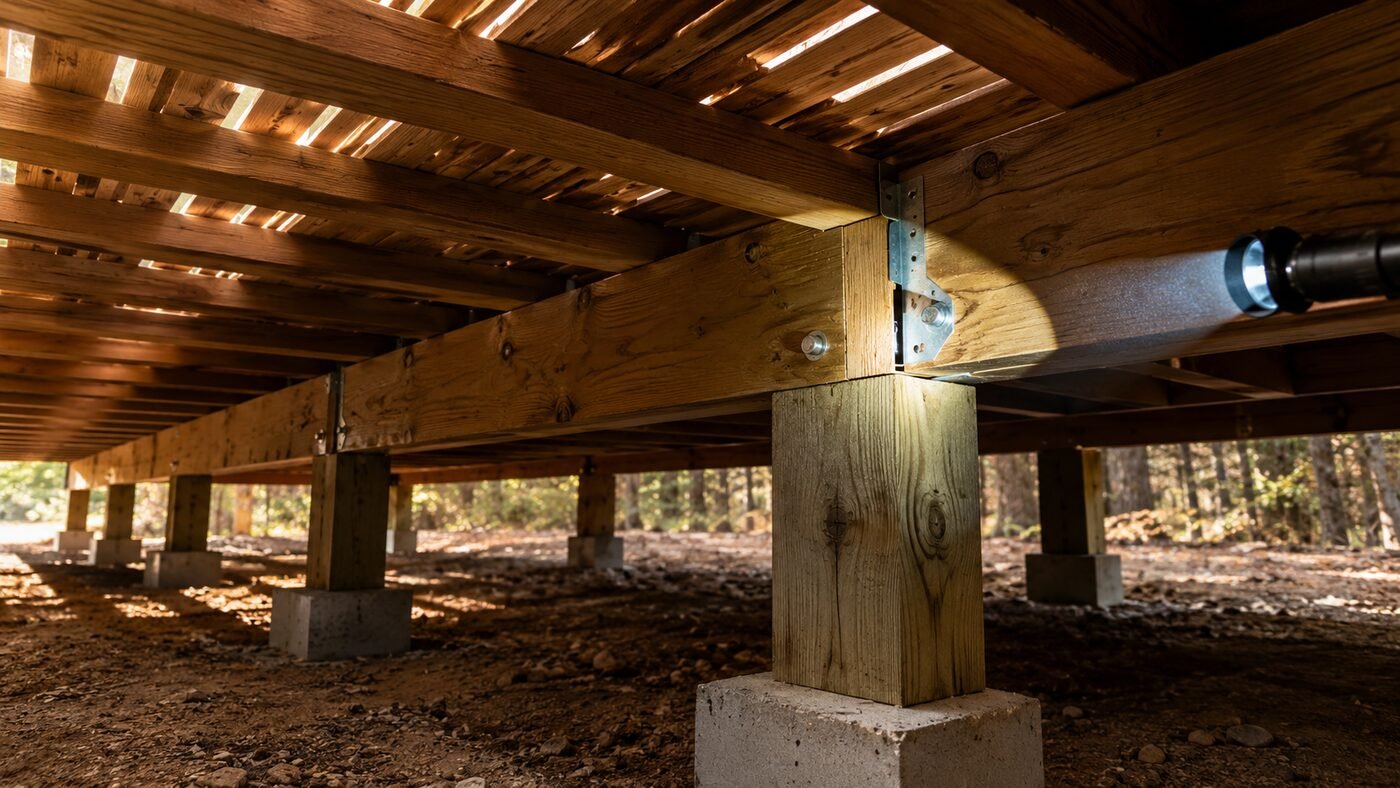
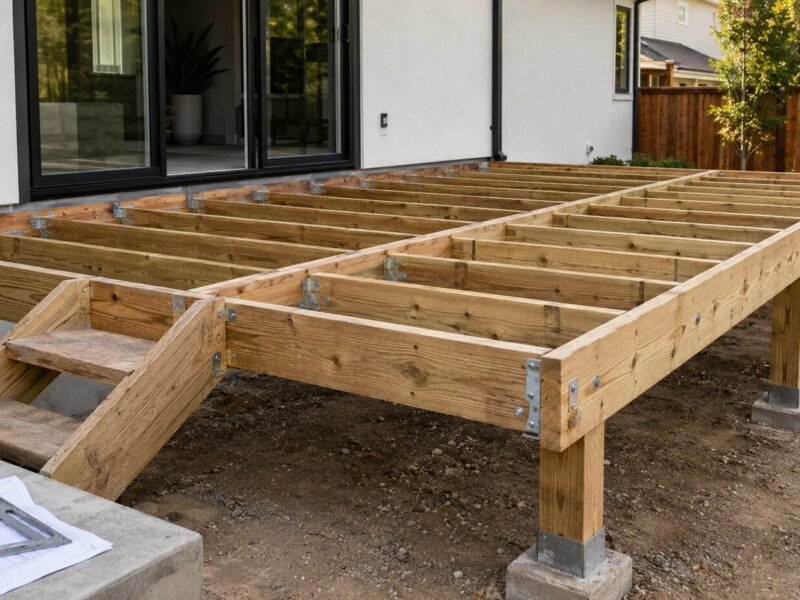
With the house connection verified, the inspection moves beneath the deck to follow the load down to the ground — the posts, footings, beams, joists, and connectors that carry every pound of weight. This is the core of any deck framing inspection checklist, and it rewards a flashlight and a probe far more than a glance from the surface above.
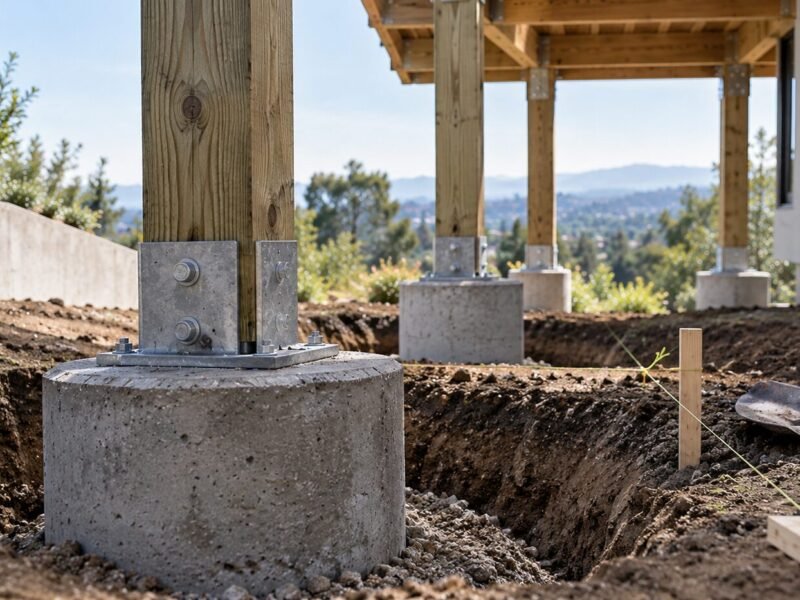
- Sound post bases. Where a post meets its footing is a magnet for moisture. Press a screwdriver into the base — healthy wood pushes back, while rot lets the tip sink in. Wood in direct contact with soil or concrete wicks up ground moisture and decays from the bottom upward, so this point deserves the closest look.
- Plumb, stable posts. A post should stand truly vertical. Any lean signals shifting footings, uneven settlement, or a loosening connection, and a leaning post redistributes weight in ways the structure was never designed to handle.
- Intact footings. The concrete footings spread the load into the ground. Look for deep cracks, crumbling, or signs the footing has heaved or sunk, since a compromised footing quietly passes its problem up through the post and into the frame.
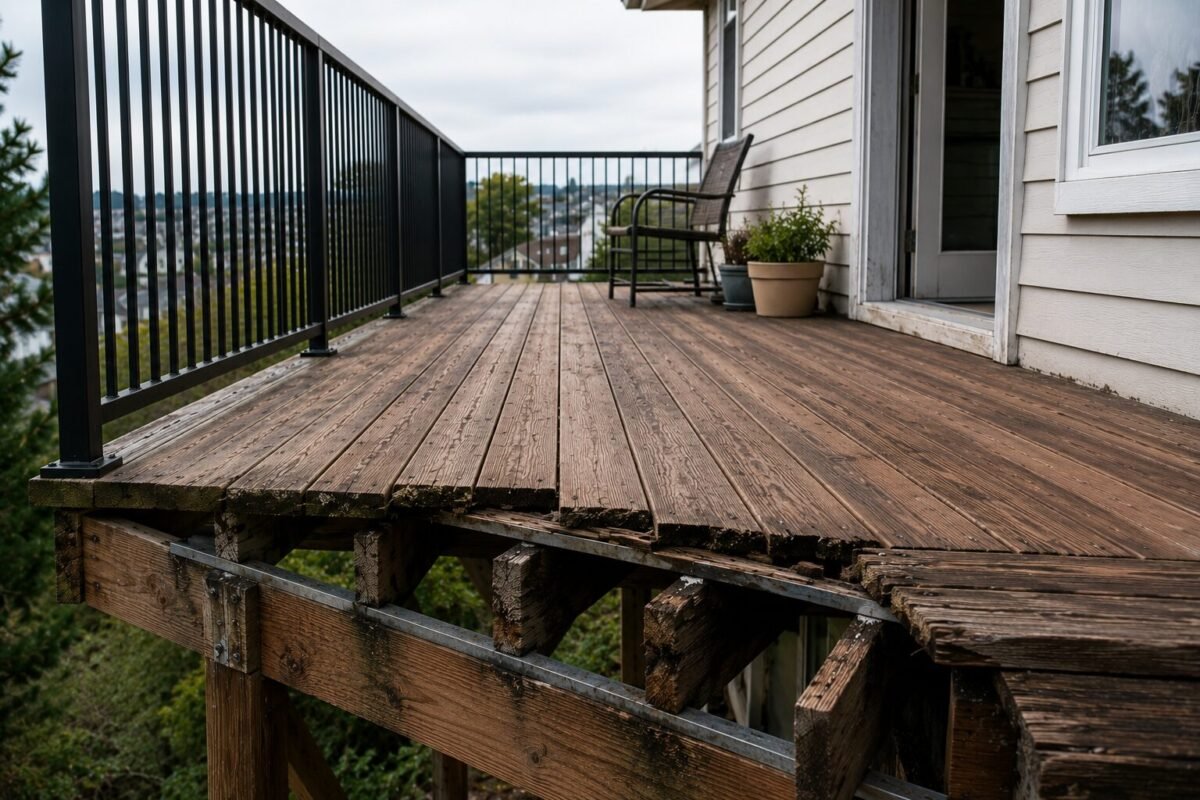
- Straight, solid beams and joists. Sight along them for sag or bowing, and scan for cracks and splits. Then press up from below: the soft, spongy feel of interior rot often hides completely beneath a surface that still looks intact. Beams that sag may be overloaded or undersized and warrant a professional’s judgment.
- Secure connectors. The joist hangers, brackets, and metal connectors that tie the frame together must be fully fastened with the correct hardware and free of rust. Missing nails in hanger holes, or the wrong fasteners entirely, are common and consequential mistakes.
Together, points six through ten confirm that the path carrying weight to the ground is intact. Because so much of this lives out of sight, it is also the group most often skipped on a rushed checklist for deck inspections — and the one where a probe earns its keep.
Points 11–15: Railings, Stairs, and the Surface

The final group covers the parts people contact every day, and they carry more weight than their visibility suggests. More injuries actually arise from railing and stair failures than from full structural collapse, which makes this group a genuine safety priority in any deck safety checklist, not a cosmetic afterthought.
- Solid guardrails. Lean your body weight against the rail — it should not wobble, shift, or give. A loose guardrail is one of the most common and most dangerous defects on any deck, because it fails at the exact moment someone relies on it.
- Secure, correctly spaced balusters. The vertical members should be firmly attached, with none loose or missing, and spaced closely enough that a small child cannot slip through. Guardrail height should meet code — generally at least 36 inches for residential decks.
- Sound stair stringers. The stringers are the diagonal boards that carry the stairs. They must be free of cracks and splitting, properly attached rather than merely toe-nailed, and free of rot where they meet the ground.
- Continuous, graspable handrails. A handrail should run the full length of the stairs and be shaped so a hand can actually close around it. Do-it-yourself builds miss this constantly, and a missing handrail turns an ordinary stumble into a fall.
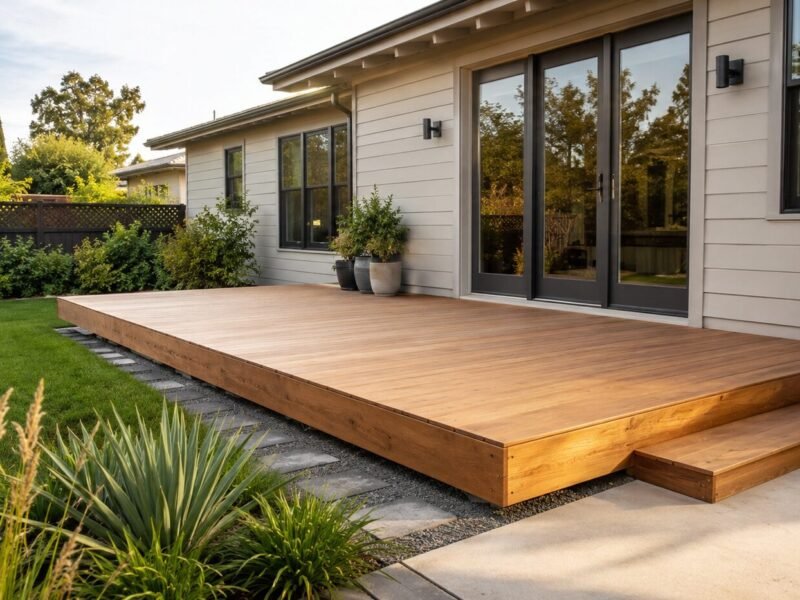
- A solid walking surface. Walk the whole deck. No board should feel soft, deflect more than about a quarter inch between joists, or show popped fasteners or splintering that threatens bare feet. The surface is where wear shows first, even when the structure below is sound.
Running these final points closes out the full fifteen. A deck that passes every one is in genuinely good shape; a deck that fails even a single critical structural point should be taken out of use until a professional weighs in.
Tools That Make the Difference
A careful wood deck inspection checklist relies mostly on trained eyes and hands, but a few simple tools reach where sight alone cannot. Three earn their place in almost every kit:
- A screwdriver or awl — the classic probe; pressed into suspect wood, it tells firm timber from rot in a second.
- A moisture meter — reads dampness inside boards that look dry on the surface, flagging trouble before it shows.
- A flashlight — turns the dim underside of a deck, where the most important connections live, into something you can actually read.
None of this requires special training to hold, but interpreting what they reveal is where experience pays off. A homeowner can absolutely learn how to inspect a deck well enough to catch obvious problems; the harder skill is knowing when a soft spot or a hairline crack signals something the naked eye should not be trusted to judge alone.
How to Read Your Results
Finding a defect is only half the task — knowing what its severity demands is the rest, and it is where a home inspector deck checklist proves its worth. The results of any home inspection deck inspection checklist sort naturally into three tiers of urgency. Matching your response to the tier — treating a deck structural inspection finding differently from a cosmetic one — is what separates sound management from wishful thinking.
|
Result |
What it means |
The right response |
|
All points pass |
The deck is in good condition |
Record the date; re-check in about six months |
|
1–3 non-structural items fail |
Wear that is not yet dangerous |
Schedule repairs before the next season of heavy use |
|
Any critical structural point fails |
Ledger, post, beam, or deflection compromised |
Stop using the deck; arrange a professional evaluation right away |
The dividing line that matters most is the bottom row. A splintered board or a slightly loose baluster is a maintenance item you can plan around. A soft ledger, a leaning post, a sagging beam, or a floor that gives underfoot is a different kind of finding entirely — and a cosmetic touch-up is never the answer to a structural failure.
When to Bring in a Professional
A careful owner can work through this list, but certain situations call for trained eyes regardless of how the self-check turns out. Knowing how to inspect a deck at a basic level is genuinely useful; knowing when that is not enough is just as important.
Several triggers justify a professional review on their own. A deck more than fifteen years old that has never had a formal evaluation is overdue, simply because accumulated decay has had years to hide. Any structural finding — movement at the ledger, a leaning post, sag in a beam — belongs with a professional rather than a weekend repair. The same holds for a deck built without permits, where the quality of the original work is unknown, and for one about to host a large gathering, where concentrated load becomes a real factor. And when you are selling the home, a documented review heads off unwelcome surprises during the buyer’s inspection.
Building an Annual Habit

The industry set aside May as Deck Safety Month for a reason: a predictable rhythm catches problems while they are still small and inexpensive to fix. An annual deck inspection, ideally in spring after winter has done its worst, keeps a structure honest. Scheduling that annual deck inspection on a fixed date each year is the simplest way to make it stick. A quick walk-through with a deck safety checklist after a severe storm or before a large event costs nothing and now and then catches something that genuinely matters.
For anyone maintaining a rental property or a multi-unit building, this discipline carries added weight. In California, elevated decks and balconies on apartment buildings fall under mandatory inspection laws, and an owner whose routine already tracks condition finds formal compliance far smoother. Whether the routine is a personal checklist or preparation for a legally required assessment, the underlying habit is identical — look before there is a reason to.
The Point of the Checklist
A thorough home inspector deck checklist is not about paperwork or passing a test. It is the quiet confidence of knowing the structure beneath your family and guests will hold, season after season, with no hidden defect waiting to surface at the worst possible moment. Most of the fifteen points on a residential deck inspection checklist take only seconds to check and cost nothing beyond a little attention paid on purpose. That is the quiet economy of prevention.
If your self-inspection turns up anything structural, or if your deck falls under California’s inspection requirements as an elevated element, the sensible next step is a professional assessment. Whether the property is governed by SB 721 for rentals, SB 326 for condominiums, or a San Francisco building under SF Section 604, the goal never changes: find what the eye cannot, and act while the fix is still simple.